
Home workouts not hitting the same as they did in the gym? Like most people right now, you probably don’t have access to gym equipment and you’re constantly trying out the “new best home workouts” you found online…
… but it just doesn’t feel like you’re getting the job done, does it?
Well, you’re in luck!
By the end of this article, you’ll be armed with 5 highly effective methods for getting the most out of your home workout without the need for expensive equipment, so you can finally feel satisfied after your workouts.
But, before we dive in, I need you to do a little something for me…

STOP SEARCHING FOR RANDOM ONE-OFF WORKOUTS ONLINE!
Sorry, for yelling, but this is important.
While you may be bored with your current home workout, hooking up with coach Google and searching for the latest celebrity online workout or that fat incinerating, booty building, beast mode session from your favorite supplement company shouldn’t be your go-to remedy.
Why?
Because doing so simply adds too much chaos to your home workouts.
And if there’s anything we hate more at Keenan Online, it’s high levels of random chaos in your training.
Just because you’re stuck at home in isolation doesn’t mean you can’t have structure in your workouts.
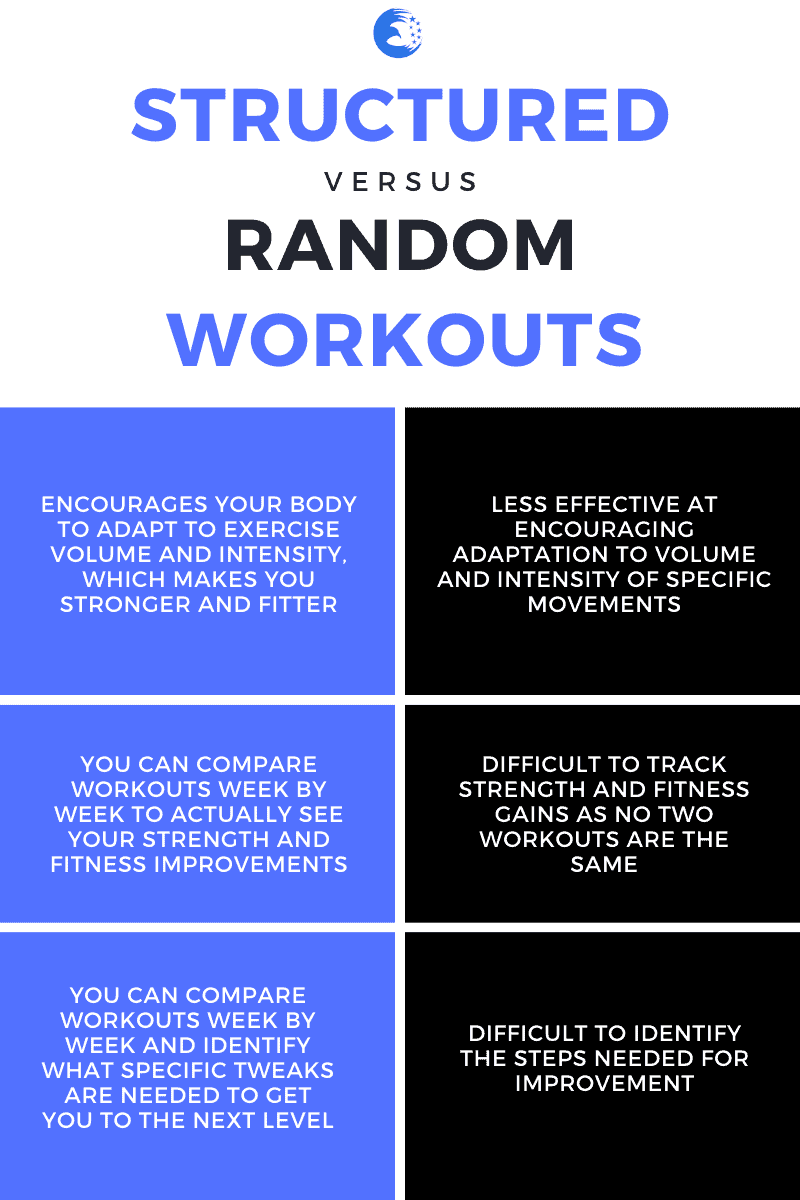
Structured workouts, that is workouts that feature the same exercises each week that get progressively harder as you adapt to them, provide far superior results compared to sporadic workouts filled with random exercises.
Let’s take a look at jiu jitsu for an example…
If your goal is to improve your guard retention, your best bet is to play from you back as much as possible in training.
If you instead work on random positions, playing from top, escaping the back, etc, your guard retention isn’t going to improve anytime soon…
… you need to focus if you want to adapt.
If you don’t have a structured workout program in place right now, I suggest either …
Searching for 4 week + structured programs from credible publications and/or strength and conditioning coaches…
Researching how to structure home workout plans of your own (we’ll be publishing an article on that soon, stay tuned)…
Finding a program that lasts for at least one-week minimum and combining that with the 5 lessons you’re about to learn below.
But, before we dive into those lessons, I have one more final point to cover…
WHY ISOLATION MEANS YOU HAVE TO WORKOUT DIFFERENTLY
It’s super important that we get straight on your goals and expectations in your home workouts before we move on.
This article was written for the sole purpose of helping those who are stuck at home with little to no equipment during the coronavirus pandemic of 2020.
This is not an article on preparing yourself for competition.
Competition preparation, that is strength and conditioning training with the goal of being “as ready as you possibly can be” come tournament day, is a much different scenario.
Competition readiness would ideally see you move through specific goal-oriented periodization phases.
A general 12-week strength and conditioning program for a competitive athlete – outside of the quarantined era – may look like this…
- General Preparation
- Basic Strength
- Strength-Power
- Peaking (Specificity)
- Rest
While the order of phases (or mesocycles) above suit the goal of competition readiness, following a similar protocol during isolation isn’t recommended.
Why?
Well, the above structure has an ultimate goal – getting you as ready as possible come game day, that means…
- Ensuring energy systems have been trained in a specific order to produce the best ‘you’ possible come game day
- You’re free from fatigue or are experiencing as minimal fatigue possible come game day
- You have achieved a goal of either improved strength, speed, endurance, etc; come game day and can tap into that improvement
To achieve all of this, the mesocycle phases above generally move from one energy system to another, decreasing in intensity, as competition date nears.
That is
Phase 1: General Preparation = Higher intensity & Lower Specificity of Movement
All the way to…
Phase 5: Peaking (Specificity) = Lower intensity & Higher Specificity of Movement.
At earlier stages, you would expect to work with heavier weights and generalized movements – e.g. compound movements like squats, bench, and deadlifts at 80% of 1RM (1 rep max) for 5 sets of 5-8 reps accompanied by accessory exercises e.g. dumbbell work, leg presses, unilateral movements etc; to work on improving individual muscles for the larger movements.
After general preparedness and strength phases have been completed, you would then begin tapering down in intensity and gradually replacing general movements with sport-specific movements. E.G. little to no barbell work and a higher focus on skill training like drills and so on.
The information on this is more than enough to fill another article, and I no doubt will write one on competition preparation once the dust of COVID-19 has settled and life gets back to normal.
Until then, let’s get back to the subject at hand…
… getting the most out of your home workouts without extra equipment.
5 Ways To Get The Most Out Of Your Home Workouts Without Extra Equipment
Even though we won’t be working through a set of phases, as mentioned above, we do need to consider the body’s ability to adapt to the physical stress of #beastmode.
And adaptation is a good thing…
Adaptation is our fundamental mechanic for getting stronger – e.g. your body goes through the stress of deadlifting 175 lbs for 8 reps (approx 80kg), it then adapts in preparation of this lift happening again and (assuming all things equal) you find you can now hit those 8 reps much easier the next time around.
Congratulations. You’re getting stronger.
And how do you know you’re stronger?
Adaptation told you so.
Yes, not only will your muscles get stronger through the biological miracle of adaptation, but it can also serve as a metric for seeing how much stronger you’ve become.
So, how do we use adaptation to our advantage and improve more over time?
Progressive Overload
Progressive overload is the focus on the gradual and incremental increase of stress to aid in achieving a desired physiological outcome.
Basically, when an action becomes easy, you make it harder, and in theory, you get better.
The most common method for progressive overload you may be familiar with, and our first method for getting the most out of your home, relates to…

1. Intensity – the addition of more weight to an exercise
For example:
You find deadlifting 175 lbs for 8 reps over 3 sets challenging.
Over time the challenge of 3 sets of 8 reps begins to diminish.
You add another 10 lbs to the bar and once again, it becomes a challenge.
However, for those without the luxury of being able to add more weight to your exercises, or the luxury of even having weights for that matter, progressive overload through additional weight won’t be an option.
Thankfully, there are four other methods you can adopt for progressive overload in your home workouts without the need for extra equipment.
These include…

2. Volume – The addition of more reps and/or more sets
For example…
You find 3 sets of 10 reps in the first-week challenging.
The next week you perform 3 sets of 12 reps easily and decide that you will now program your next week’s workout at 3 sets of 15 reps.
Or…
You come to a point where you perform 3 sets of 15 reps without breaking a sweat, so you decide that next week you’ll program 4 sets of 12 reps instead.
Adding another set in the situation above, instead of upping the reps to say 18-20, has a purpose and a distinct benefit.
While adding high rep numbers to a set can definitely help you feel the burn, it can also cause unfavorable fatigue within a set and lead to poor form and movement quality.
Adding an extra set and dropping the rep range slightly will provide you with the valuable rest needed in between sets, which helps prevent fatigue, helps you maintain movement quality, and gives you the biggest bang for your buck in each set.
Also, adding a set means you also add more volume in total.
For example…
18 reps for 3 sets = 18 x 3 = 54 reps (plus potential for earlier fatigue in-set and reduced quality of movement)
15 reps for 4 sets = 15 x 4 = 60 reps (pus potential to maintain quality of movement)
Important Note – Generally, rep ranges depend on desired goals and posses an inverse relationship to the weight lifted.
Given that working out at home means you’re reliant on your body weight, lighter weights, or resistance bands, finding a challenge at lower strength based rep ranges isn’t always possible. This is why reps ranges found in online home workouts are normally prescribed at 12-15.
When it comes to rep ranges, I always suggest starting conservatively to help you maintain form and gauge your ability with the movement.
Let’s use the rep and set range prescription of 3-4 sets of 12-15 as an example…
If you find yourself falling 1 or 2 reps shy of failure in the last set (meaning, the last 12 reps you performed were challenging, and if you were to do 1 or 2 more you would 100% fail), don’t go adding more reps just yet, as falling 1 or 2 reps shy of failure on your last set is a good indication that the weight and ranges are right for the moment.
However, If you feel you can easily perform higher than the rep range, it means you are either – or have adapted to being – in a position where the weight and or rep range isn’t challenging enough to encourage further adaptation, which is a sign you need to increase the reps.
Once the high end of the rep range becomes easy, that’s generally your queue to add another set.
For example…
Pushups at a 12-15 rep range
Week 1:
Set 1: 13 reps – Set 2: 13 reps – Set 3: 13 reps
Week 2:
Set 1: 14 reps – Set 2: 14 reps – Set 3: 14 reps
Week 3:
Set 1: 17 reps – Set 2: 17 reps – Set 3: 17 reps
Week 4:
Set 1: 13 reps – Set 2: 13 reps – Set 3: 13 reps – Set 4: 13 reps
How you add reps and sets is totally up to you, however, I find the protocol above for adding reps first, then sets works best for adaptation while preventing potential injury from overloading each set with reps.

3. Rest In Between Rounds – The gradual reduction of time in rest intervals
Rest is an important factor in the way you train and I can’t stress the following point enough…
Resting in between rounds does not make you a pussy!
As this is a major problem for many athletes, let me qualify this point by asking you a question…
What is the main purpose of training?
If you answered going balls to the wall every time without fail to prove how much of a hero you are to people who actually don’t give a sh*t, congratulations, you’re a meathead.
But, if your answer was “to get better”, congratulations, you are – in fact – on the path to getting better.
Rest is important in between rounds because it facilitates one of the most important factors necessary for improvement.
And that factor is…
… quality over quantity.
Let’s look at deadlifts as our example…
You hit your first set of 10 reps at 175 lbs. You feel good, you look good, oughta be in Hollywood, so you decide to hit that next set as soon as possible.
You find the next 10 reps were a bit more difficult, and your form started to suffer in the last two or three reps. All good baby, no pain no gain.
You decide to take one or two deep breaths in lieu of a proper rest period and set up for your third set.
This time, you look like a dog taking a shit. Like literally, your back rounds out and you’re forced to recruit less adequate muscles to hit your lift because the muscles you’d ideally be leveraging are fried.
You managed to hit the 10 reps though, so all good, right?
Not necessarily.
As you fatigued the muscles you’d ideally be counting on to move the bar, other less adequate muscles have now taken on more of the load.
This means the key muscles needed for the movement didn’t get the proper stimuli required for ideal adaptation to occur.
This also means you’ve now put your other less adequate muscles at a higher risk of injury.
And this injury doesn’t necessarily have to come during the workout.
I guess what I’m saying is, be careful the next time you bend down to pick your kid up, because there’s possibly a ticking time bomb waiting to explode – and I ain’t talking about what’s in their diapers.
So, is it wrong for us to adjust rest times to improve adaptation potential?
No, but it does mean we have to be smart about it.
Yes, progressive overload can be achieved by reducing rest times. But the following questions need to be asked first…
- What exactly am I reducing? How do you know how much time you’re going to cut down in between rounds if you don’t have a solid protocol for rest times set in place? Before you add rest time reduction as a strategy, first be sure you’re getting regular rest times in. I recommend the use of a stopwatch, determine how long your rest times will be and stick to them like you would your reps and sets.
- What exercises am I doing and how do they affect rest times? When deciding how long your rest in between rounds will be, you need to first consider how they will affect the quality of your exercise performance. Generally, compound movements and those recruiting larger muscle groups (like deadlifts) will require longer recovery times, where exercises for smaller muscle groups (like calf raises) require less. Once you have decided this, you need to then identify the minimum rest time required before quality is reduced and the risk of injury has been increased. Once the minimum has been identified, this will be the number you can progressively work towards.
As quality of movement over quantity is so important for improvement and injury prevention, I generally suggest reserving reduced rest times for bodyweight movements and exercises working smaller isolated muscle groups – and only then as a last resort.

4. Frequency – The number of workouts in a week
Just like everything else I’ve mentioned already, you need to build to this.
Don’t act like a savage and work out 5 times per week if you haven’t done so before.
How you bump up your training frequency largely depends on the number of exercises, sets, reps, and body groups worked in your current home workout split.
If you feel you’ve hit a progressive overload capacity with rep ranges, sets and rest, it may be time to add another training day to your week.
However, be smart and don’t fatigue yourself.
If you’re working out 3 days per week at home, doing 6 different exercises per day at 5 sets of 15 reps each and you plan to add another day, do so, but drop the volume in each of the days.
So instead of performing 6 exercises each session at 5 sets of 15 reps, 4 days a week, you’re doing 4 to 5 different exercises per day at 4 sets of 12.
This will aid you in progressively overloading the additional day, and help you avoid burning out.

5. Tempo – The speed of movement
Tempo – or time under tension – is a great method for getting the biggest bang for your buck in your home workouts.
But, like everything else in this list, tempo should not be applied randomly to your training. This is especially true for tempo and we’ll talk about why after I introduce the concept.
Basically, tempo relates to the designated speed of each phase in a movement.
These phases are…
Eccentric – Also known as ‘negatives’, this is the lowering phase. Think chest moving to ground in the pushup and the lowering of your body after a pull-up.
Isometric – The mid-phase of a movement. Think about the bottom of a squat or the bottom of a pushup.
Concentric – The explosive movement. Think standing up in a squat, coming up in a pushup.
For safety, it is important to note that for many movements the concentric phase should remain explosive at heavier weights: one for safety and two to avoid training sluggish patterns in what would otherwise be an explosive movement.
For example, at heavyweights, the concentric (or explosive) phase of a bench press (i.e. moving the bar from chest upwards) should remain fast.
Time under tension options may look something like the following…
Eccentric – Isometric – Concentric
1-0-1
3 – 0 – 1
3 – 1- 1
5 – 0 – 1
1- 4 – 1
Ok, so why is it so important we ensure tempo isn’t random in our training, and what do I mean by random?
In relation to tempo, random application can be characterized by focusing on two or more movement phases in one day.
For example, performing a 4-0-1 tempo for squats, then performing a 1-3-1 tempo for lunges in the same session.
The issue here is that spreading the focus on eccentric AND isometric phases in one session is a perfect recipe for fatigue.
Meaning, you’re ensuring your potential for high-quality muscular contractions diminishes severely, even after a small number of reps.
Which brings us back to the mantra – quality over quantity.
This is why it’s best to either split up your eccentric, isometric and concentric focused tempos by at least a day or ideally a week or more.
Movement phases for progressive overloading have been used by strength and conditioning coaches like Cal Dietz, University of Minnesota and Olympic S&C coach, in off-season preparations for a variety of sports.
In his protocol, athletes would work in weekly blocks leading up to the start of a season, as part of the general preparedness phase mentioned earlier.
Initially, the first few weeks would have a focus on developing eccentric movements, the next few weeks devoted to isometric and the final weeks of general preparedness would be dedicated to the concentric phases.
Summing Up
There you have it.
We’ve just covered 5 effective ways for getting the biggest bang for your buck in your workouts that not only promote gains through adaptation but also act as a tool for tracking those gains so you can identify what and when to adjust and how to do it.
Soon we’ll be publishing a new article here at Keenan Online where I’ll be teaching you how to put together and customize your own home workout plan which, combined with the information above, will help you stay fit, strong and on track during isolation, without the guesswork.
Stay tuned.